Slide 1

Slide notes: To create a new Employee Master Record, or to maintain an existing Employee record, we use the "Employee Master Record" option.


Slide 2

Slide notes: Employee Numbers are 'free format' keys, and are used according to our local policies and preferences. It is quite common to use a 4 or 5 digit numbering system.


Slide 3

Slide notes: When we lookup or enter an existing Employee Key, then of course we will be able to maintain an existing Employee record. When we enter a new Employee Number, then we will create a new Employee Record.


Slide 4

Slide notes: This is a new Employee Number.


Slide 5

Slide 
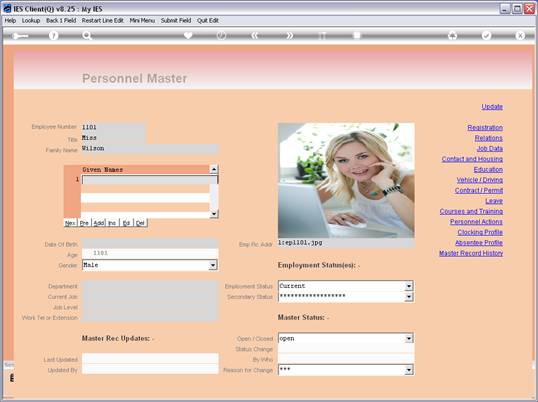
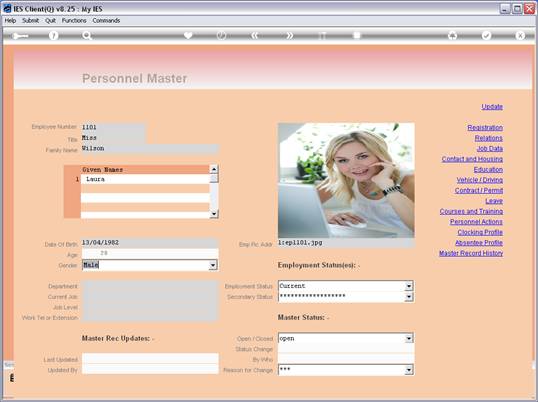
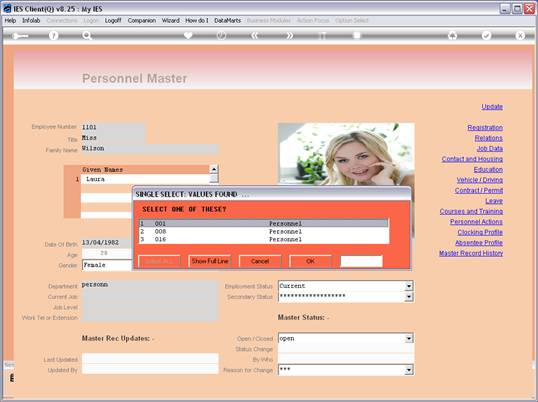
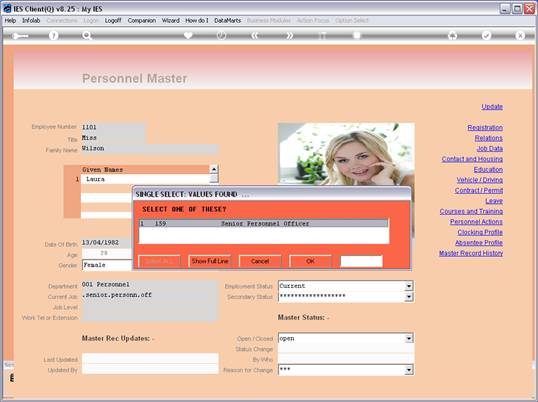
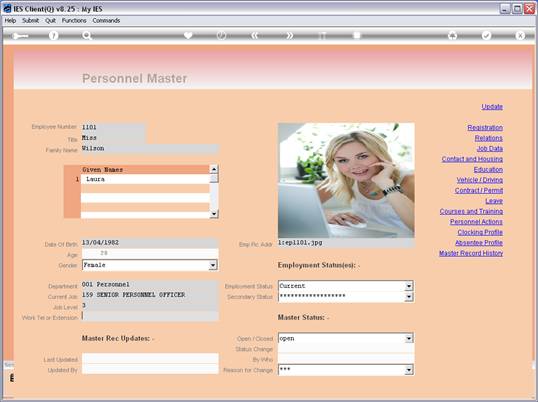
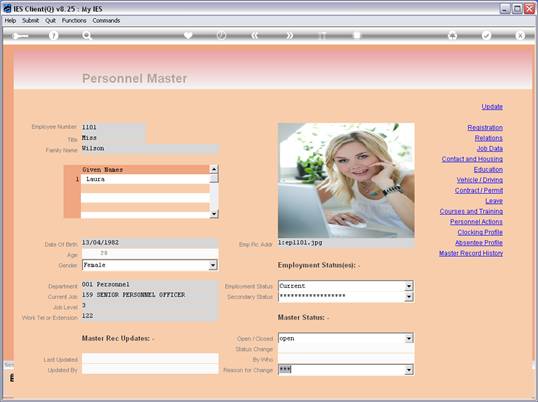
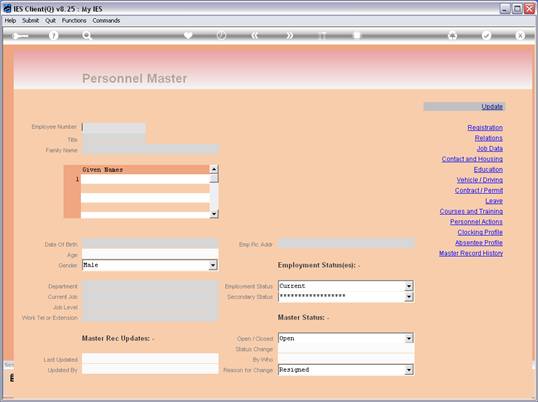
notes: Since the record is new, we are offered the standard Titles available on our local list, in order to select an appropriate title for the new Employee. The Employee Picture numbering system is automatic, and if we have already loaded the Employee picture prior to creating the new Employee Record, as in this case, then the picture shows immediately.


Slide 6

Slide notes: Next, we will enter the Employee's Family Name and First Names.


Slide 7

Slide notes: It is true that there are some cases where Family Names are not generally used. In cases like that, we will usually capture the Employee's First or Given Name also as the Family Name.


Slide 8

Slide notes:


Slide 9

Slide notes:


Slide 10

Slide notes: Multiple First Names are allowed, but in this example, we have only 1.


Slide 11

Slide notes: The Date of Birth may be entered or retrieved via the Date lookup function. As soon as we enter it, the automatically calculated AGE display will adapt.


Slide 12

Slide notes: Next we select the gender.


Slide 13

Slide notes:


Slide 14

Slide notes:


Slide 15

Slide notes: The Department is not a mandatory field, but if used, then we may now select the Department.


Slide 16

Slide notes:


Slide 17

Slide notes:


Slide 18

Slide notes: The Current Job also is not mandatory to indicate, but we may select it now.


Slide 19

Slide notes:


Slide 20

Slide notes:


Slide 21

Slide notes: The Job Level is a local classification of Job Level and may be captured or omitted.


Slide 22

Slide notes: The Telephone Number or extension may also be stated now, or later, or not at all.


Slide 23

Slide notes: The Employment Status field has a primary and secondary option, and we may use that in any way we see fit, i.e. to classify Employment status according to our local needs. In this case, we use CURRENT for an Employee that is currently employed here. If the Employee should at any stage no longer be employed here, then we will change the status but retain the historical record.


Slide 24

Slide notes: The 2 status fields allow us to capture any new values, and will then remember them on the droplist for future use on other Employee records.


Slide 25

Slide notes: A currently employed person usually has a state of OPEN for the master record, and we may use the CLOSED state when the Employee is no longer employed here.


Slide 26

Slide notes: We have now conformed to the minimum requirements of an Employee record in the system, and at this stage it is advisable to create the new Employee record by choosing UPDATE.


Slide 27

Slide notes: We can then retrieve the newly created, but now active record, to enter more details, dependent on our local policies for Employee details.


Slide 28

Slide notes:


Slide 29

Slide notes:


Slide 30

Slide notes:


Slide 31

Slide notes:


Slide 32

Slide notes: Since the Employee Record now exists, we may use this option at any time for maintenance on the Employee Master record, and we may amend and edit any of the fields on the Employee Master.


Slide 33

Slide notes: This is the HELP entry for the Employee Status field, explaining how it may be used.


Slide 34

Slide notes:


Slide 35

Slide notes:


Slide 36

Slide notes:


Slide 37

Slide notes:


Slide 38

Slide notes: On the right hand side, we have a range of functions for entering further information on this Employee. Some of these options may be used locally, and some not, depending on our needs. We will discuss each of these functional options in separate tutorials.


Slide 39

Slide notes: