Slide 1

Slide notes: When we have installed a new Business Datamart and wish to set up the new Medical Business, we start in the Set Up module. We should ensure that we are in the correct Datamart, because we will be deleting any current set up and data in this Datamart when we proceed with the set up.


Slide 2

Slide notes:


Slide 3

Slide notes: Here we choose 'Start Primary Set Up'.


Slide 4

Slide notes: 
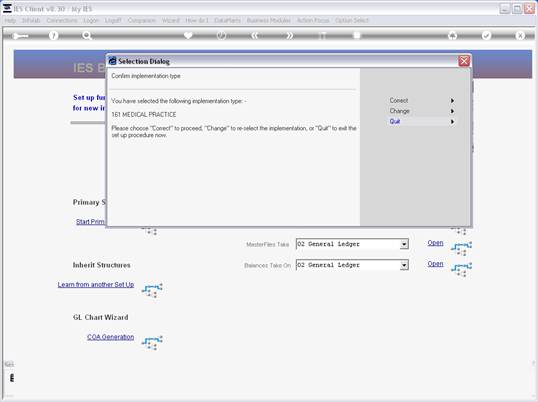
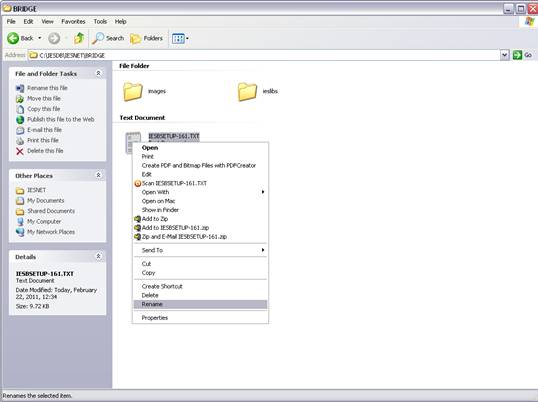
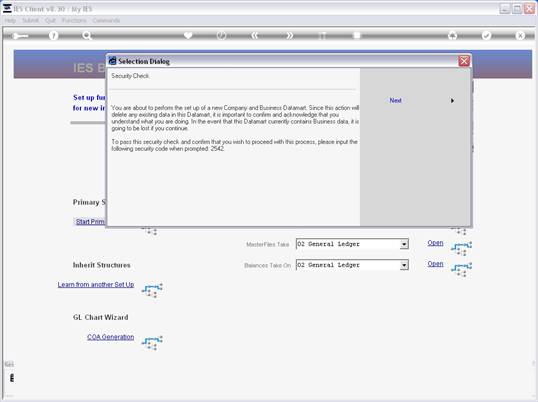
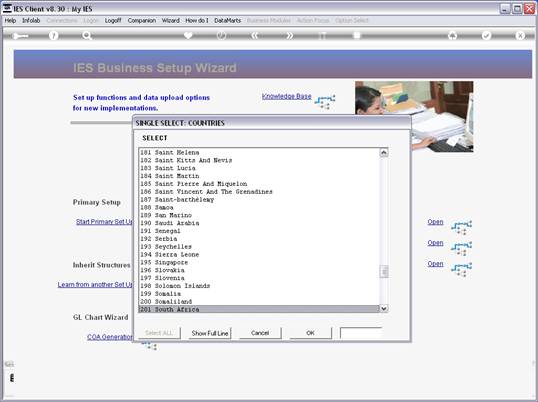
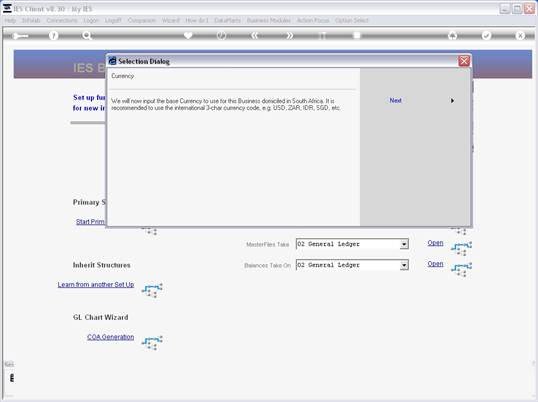
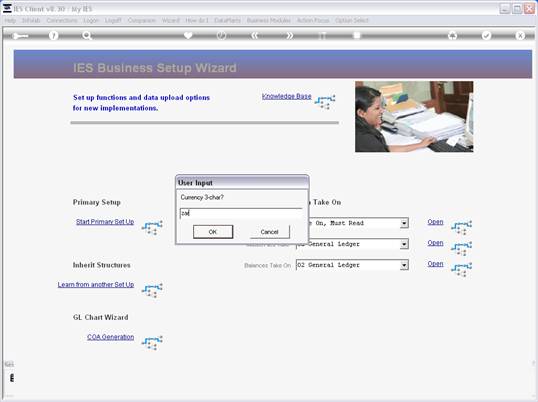
We note the security code, which we will have to input correctly otherwise the set up will not continue. This is a safety precaution, because once we input the security code, then any and all existing data in this Datamart will be deleted and initialised for a new Company. As such, we want to be sure we are not in the wrong Datamart and potentially deleting live data.


Slide 5

Slide notes:


Slide 6

Slide notes: The system now gives us a clear indication of which Datamart we are working in.


Slide 7

Slide notes:


Slide 8

Slide notes:


Slide 9

Slide notes: And then calls for the security code. In the event that we are in the wrong Datamart and wish to abort, we can choose 'cancel'. To proceed, we input the security code.


Slide 10

Slide notes:


Slide 11

Slide notes: The system then removes existing data in this Datamart and prepares it for a new Company set up.


Slide 12

Slide notes:


Slide 13

Slide notes: The next step is to choose the implementation type. For a Medical Business, we will choose accordingly.


Slide 14

Slide notes:


Slide 15

Slide notes: The Medical set up works with an instruction file. On the 1st round, we do not have the instruction file yet and so we choose to have it printed.


Slide 16

Slide notes:


Slide 17

Slide notes: The default instruction file is placed on the BRIDGE folder, where we can edit it with our specific requirements for the set up, before saving it with the correct name for subsequent import.


Slide 18

Slide notes:


Slide 19

Slide notes:


Slide 20

Slide notes: Here we see the BRIDGE folder, and the instruction file, which is currently in Text format.


Slide 21

Slide notes:


Slide 22

Slide notes:


Slide 23

Slide notes: The instruction file is full of comments that explain how we can change or supplement to it before we are ready for the actual set up.


Slide 24

Slide notes:


Slide 25

Slide notes:


Slide 26

Slide notes:


Slide 27

Slide notes:


Slide 28

Slide notes:


Slide 29

Slide notes:


Slide 30

Slide notes:


Slide 31

Slide notes:


Slide 32

Slide notes: After we have made any changes to the instruction file, we will now rename it correctly for the import.


Slide 33

Slide notes:


Slide 34

Slide notes:


Slide 35

Slide notes: The file needs to be renamed with a CSV extension.


Slide 36

Slide notes:


Slide 37

Slide notes:


Slide 38

Slide notes: And then we are ready for the 2nd round of the primary set up routine.


Slide 39

Slide notes: Again, we note the security code, and follow all the same steps as before, until we reach the import option.


Slide 40

Slide notes:


Slide 41

Slide notes:


Slide 42

Slide notes:


Slide 43

Slide notes:


Slide 44

Slide notes:


Slide 45

Slide notes:


Slide 46

Slide notes: This time, we use the import option.


Slide 47

Slide notes: We choose the month on which the Financial Year ends for this new Company.


Slide 48

Slide notes:


Slide 49

Slide notes: And we select the last Depreciation period. If the Asset Register is not important, then we just choose the last period prior to the 1st active Period in the new set up.


Slide 50

Slide notes:


Slide 51

Slide notes:


Slide 52

Slide notes: Then we select the country of domicile and the base currency for the Accounts.


Slide 53

Slide notes:


Slide 54

Slide notes:


Slide 55

Slide notes:


Slide 56

Slide notes:


Slide 57

Slide notes:


Slide 58

Slide notes:


Slide 59

Slide notes:


Slide 60

Slide notes:


Slide 61

Slide notes:


Slide 62

Slide notes:


Slide 63

Slide notes: We also choose the primary Tax Rate for VAT or the local tax type if not VAT.


Slide 64

Slide notes:


Slide 65

Slide notes:


Slide 66

Slide notes:


Slide 67

Slide notes:


Slide 68

Slide notes:


Slide 69

Slide notes:


Slide 70

Slide notes:


Slide 71

Slide notes:


Slide 72

Slide notes: The new Medical business is now set up and ready for use. Optionally, we may wish to set up further Items like Stock, Appointment Books, Patient records or other, but the new enterprise is certainly ready for business.


Slide 73

Slide notes:


Slide 74

Slide notes: