Slide 1

Slide notes: There are some principles and guidelines that are worth knowing and that apply for all data Imports.


Slide 2

Slide notes:


Slide 3

Slide notes: There is usually a Data Layout View that will tell us what is required or expected of the Data that we will upload.


Slide 4

Slide notes: In this example, we are doing a Budget Data Import, and in this case, the import data, when seen in a spreadsheet context, must be arranged in 5 columns as listed above. Column 5 is optional, and may be blank. However, whenever a column is indicated, even though optional, it must be present. So if column 3 is optional, then it must still be present otherwise column 4 will no longer be the 4th column from a data viewpoint.


Slide 5

Slide notes:


Slide 6

Slide notes: So here we have the data currently in a spreadsheet. In fact, it can also be a Text File with comma separated values, but most people find it easier to work with a spreadsheet.


Slide 7

Slide 
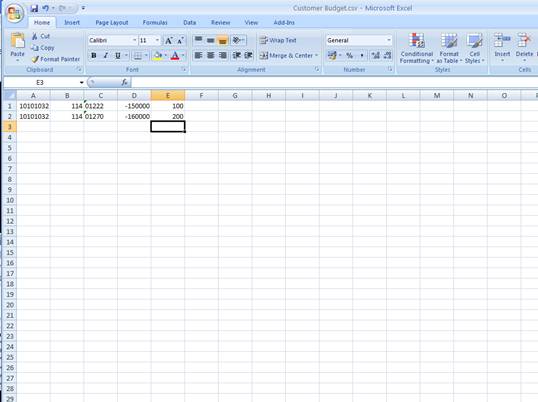
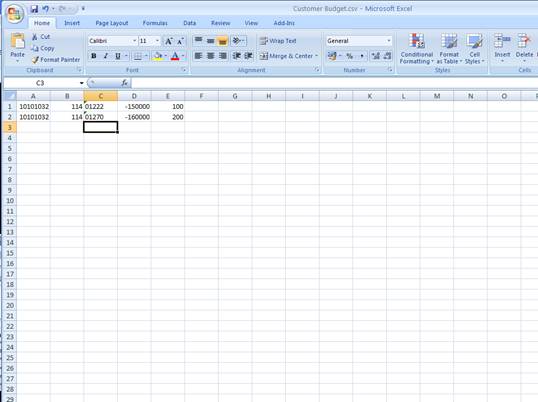
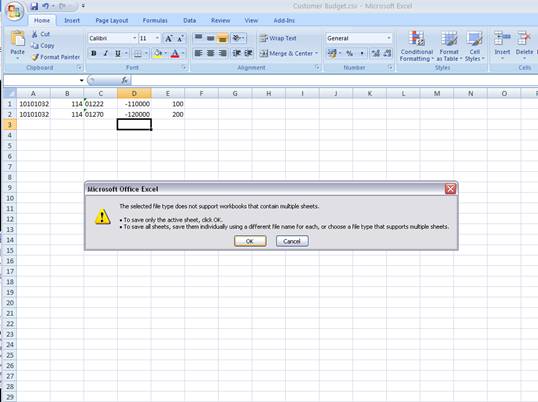
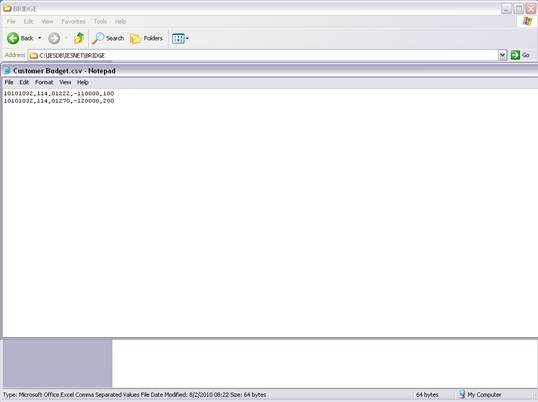
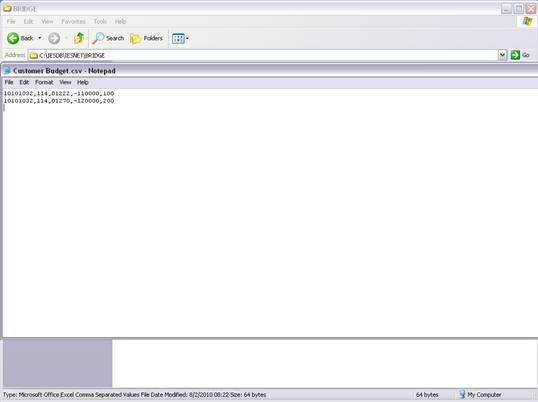
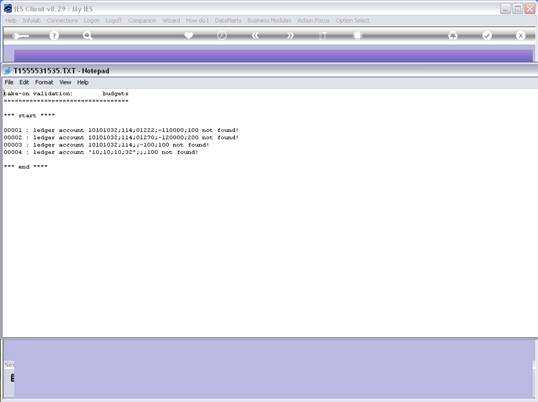
notes: We may note that column C, the 3rd column, is formatted for Text, because it contains Account Codes that start with a zero, and in the spreadsheet, if we do not format these cells for a Text field, then the leading zero will be dropped. This is quite important, because when the data is validated and the leading zeros are not there, then the system will reject the Account Codes, because in the system they start with a zero. We show this principle specifically because many Users have encountered this situation. So, whenever the values in the system have leading zeros, then we need to ensure that in the spreadsheet they have them also.


Slide 8

Slide notes: When we save the spreadsheet to produce the file that we can import, we need to save it in the right folder and we need to save it in the right format.


Slide 9

Slide notes:


Slide 10

Slide notes:


Slide 11

Slide notes: We note that the file needs to be saved to the BRIDGE folder, because that is from where the system is willing to upload the file. Next, we note that we must save the file in the CSV format, i.e. Comma Separated Values. We also note that the saved version of the data in the BRIDGE folder is not a permanent storage area, because the system will clean out the BRIDGE folder daily. So this save is for data import purposes ONLY, and if we want to preserve this data we also save it elsewhere!


Slide 12

Slide notes:


Slide 13

Slide notes:


Slide 14

Slide notes:


Slide 15

Slide notes:


Slide 16

Slide notes:


Slide 17

Slide notes:


Slide 18

Slide notes: When the file is saved correctly, we can proceed with the data import. In this example, we are first going to look at the data to note a few more points.


Slide 19

Slide notes: The CSV file can also be opened with Notepad or Wordpad, and then we will see what the data looks like in raw text mode, which is the way the system will find it when we import the data.


Slide 20

Slide notes:


Slide 21

Slide notes: So here we see the same data that we saved from the spreadsheet, in "comma separated value" format. Each line in the spreadsheet is also a line here, and each column is separated by the comma. If we get rejection error messages from the system, i.e. because the system is not happy with the data, then it is recommended to view the data like this, which makes it easy to spot problems. For example, it is possible that in our spreadsheet settings we use a different delimiter, i.e. we use a semi-colon instead of a comma. But there are many other possibilities also that we may spot more easily when looking at the data this way.


Slide 22

Slide notes:


Slide 23

Slide notes: Say for example that column 3 is optional, and on a certain line we do not have a value for column 3. Then in that case, we should see a null value in that position, but all the necessary commas or delimiters should still be present.


Slide 24

Slide notes:


Slide 25

Slide notes:


Slide 26

Slide notes:


Slide 27

Slide notes: This can also be a valid line. If any of our data values include the delimiter, in this case the comma, then the spreadsheet will, or should, save it within quotes. If not, then it will cause problems, because any delimiters found outside quotes will signal a 'next column' in the data position.


Slide 28

Slide notes:


Slide 29

Slide notes: Now we notice how we have replaced all commas with semi-colon. In other words, we are using a different delimiter, and it is allowed, as long as we indicate that delimiter as the one to use when we perform the data import.


Slide 30

Slide notes: When we are satisfied that we have a prepared data file that we can import, then we may proceed with the import itself. In this example, we are doing a Budget import.


Slide 31

Slide notes:


Slide 32

Slide notes: First of all, we import the data.


Slide 33

Slide notes:


Slide 34

Slide notes:


Slide 35

Slide notes:


Slide 36

Slide notes: The system will show only file options that are found on the BRIDGE folder, and that are of type CSV or type TXT.


Slide 37

Slide notes:


Slide 38

Slide notes: The standard delimiter is the comma, and we do not have to indicate it again. We only indicate the delimiter if we are using a delimiter that is different, i.e. not the comma.


Slide 39

Slide notes: Whenever the data is imported by the system, an option is offered to check for illegal characters that can corrupt the system data. If we are not sure that our data is 100% safe, then it is good to use this option.


Slide 40

Slide notes:


Slide 41

Slide notes: The next step is to validate the data. The system will not import data unless it is validated, and we can see that the Process Status currently indicates 'No Validated Data Present Yet'.


Slide 42

Slide notes:


Slide 43

Slide notes:


Slide 44

Slide notes:


Slide 45

Slide notes:


Slide 46

Slide notes: The Validation Report must have no entries between the 'start' and 'end' messages. If there are any data rejections, then the line numbers and error messages are listed here.


Slide 47

Slide notes:


Slide 48

Slide notes: If there are no error messages, then the Process Status changes to 'data validations passed' and that means we can perform the 'take on' step.


Slide 49

Slide notes:


Slide 50

Slide notes:


Slide 51

Slide notes:


Slide 52

Slide notes: Now we will import data that the system will reject, so we can see the error report.


Slide 53

Slide notes: In fact, we are now importing data that is delimited with the semi-colon, but we forget to indicate it at the delimiter field. So let's see what happens.


Slide 54

Slide notes:


Slide 55

Slide notes:


Slide 56

Slide notes:


Slide 57

Slide notes:


Slide 58

Slide notes:


Slide 59

Slide notes:


Slide 60

Slide notes:


Slide 61

Slide notes:


Slide 62

Slide notes:


Slide 63

Slide notes:


Slide 64

Slide notes: All 4 data lines are rejected, and it is easy to see why. In each case, the entire value is seen as the value for column 1, because there is no comma delimiter found on the line. Of course, the total value is not a valid Ledger Account Code, which is expected in column 1 on each line, and therefore the data is rejected.


Slide 65

Slide notes:


Slide 66

Slide notes: The error report may be used to identify and correct any issues with the data before we attempt to perform the import and the 'take on' yet again. When we do it right, data imports are quick, easy and seamless.